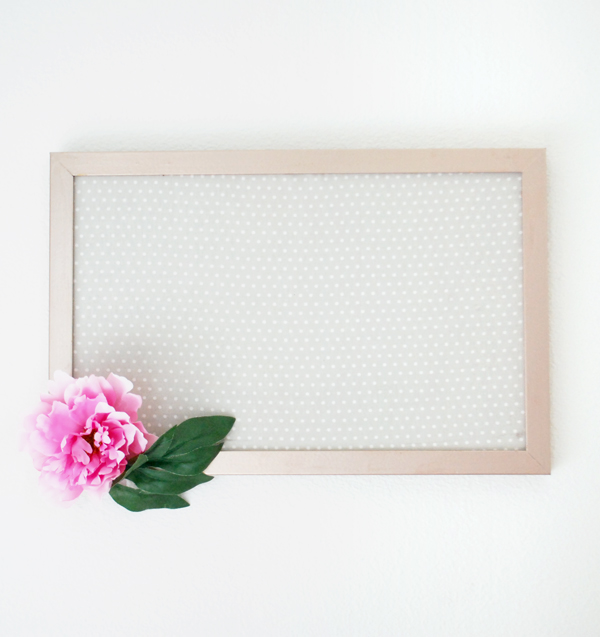
Gold framed Cork Board Tutorial- Seating Chart Display

Happy Friday!
Today I want to share with you a pretty easy DIY project I recently did to glam up my “ordinary” cork board that was laying around in my house not being put to use.
I have several cork boards in the house that I have no idea where they came from. But I don’t know what to do with them since they’re so bland and boring, and don’t really add to the decor… so I finally decided to do something about it.
If you have a large cork board, this can be used as wedding / event seating charts as well. It’s so easy to make and even durable and portable so I definitely recommend it to anyone looking for ways to display their seating charts.
Play around with your own paint colors, fabric, and decorations, and have fun!
What you need:
- Simple cork board
- Paint (in the color of your choice -I used the Martha Stewarts metallic paint)
- Glue
- Masking tape
- Piece of fabric big enough to cover the cork board
- Fabric scissors
- Credit card or some kind of thin plastic
- Paint brush or foam brush
- Razor blade
Instructions
- Measure the inner dimensions of the frame using a ruler. Write it down.
- Line the inside of the frame with masking tape (razor blades helps make clean corners).

- Paint all the visible parts of the frame. Wait to dry, and do as many coats as you need to make it look pretty 🙂 (it took me three coats)
- Cut the fabric to the size of the inner frame plus 1/2 inch on all sides (so if your frame’s inside dimensions are 12″ x 16″, then your fabric should be about 13″ x 17″)
- Lay it centered on the frame like below, and put push pins on two corners.
At this point, it would be helpful to cut the corners of the fabric like this:
- Lift up the fabric on the side that is not pinned down, and put a little bit of glue all over. (be careful not to use too much because you don’t want excess glue to show through the fabric and make ugly marks..)Then smear it with your fingers….
I used aleene’s Tack it over and over glue because I had them and it works on fabric, but I’m sure this isn’t the only one that would work well. - Then bring the fabric back in place and smooth out the surface and try to avoid wrinkles. At this point, you can remove the pins.
- Use the credit card to tuck in the extra fabric under the frame. This step requires some elbow grease:)


 Then smear it with your fingers….