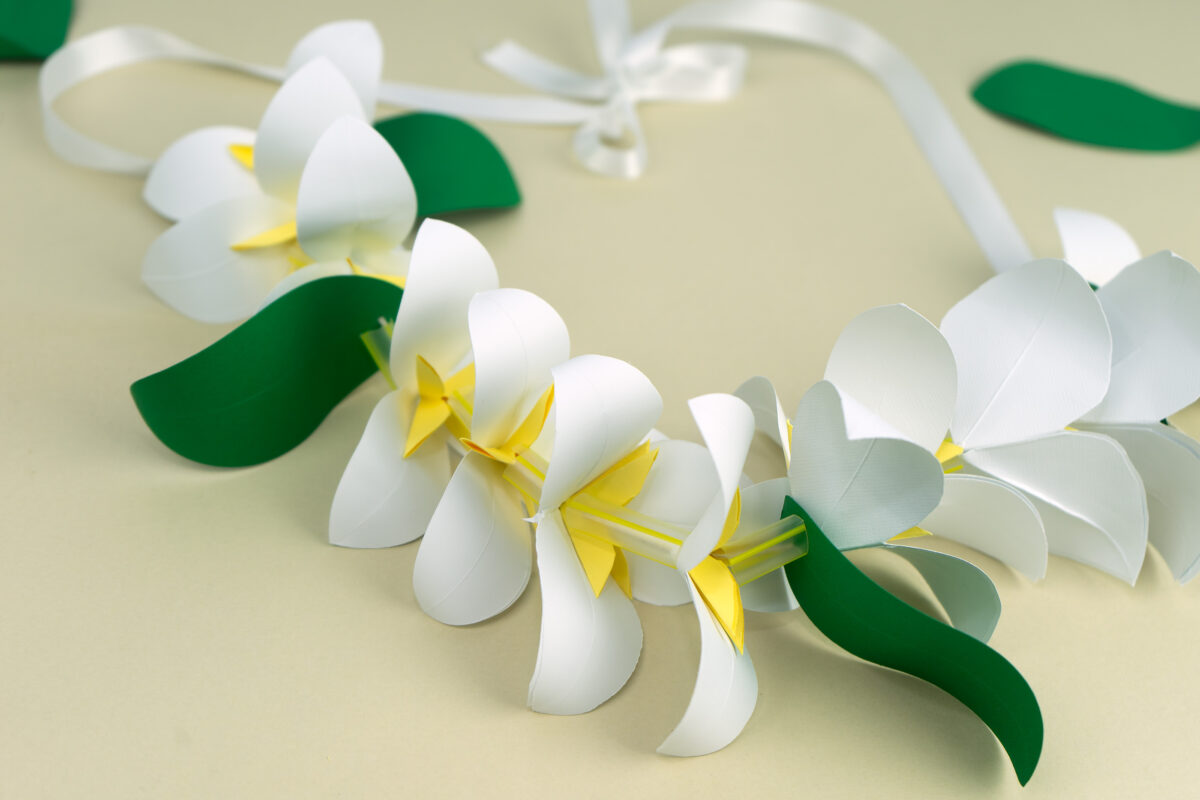
Easy DIY Plumeria inspired Paper Lei for Graduation
Recently, one of my friends who grew up in Japan asked me a question: “What’s a nice, gift you liked receiving when you graduated?” She was looking for ideas of things to give to a friend who’s about to graduate high school.
After a moment of reflection, my answer came easily: “Leis!”
I love the tradition of giving leis for graduation here in the US. They symbolize celebration, love, and good luck — and I remember how special it felt to receive them at my own graduation. It’s a gesture I’ve been happy to pass on to other graduating seniors over the years.
These days, there are so many creative variations — money leis, candy leis, ribbon leis — but I wanted to see if I can make something that felt pretty, but easy to create without any fancy tools like a laser cutter or expensive materials. This DIY plumeria lei is exactly that: simple, thoughtful, and made with love.
What you need:
• Letter-sized card stock paper in white, yellow (for the plumeria flowers) and green (for the leaves)
• Scissors
• Pencil
• Drinking straws (cut into .75” pieces)
• Twine & ribbon
• 2 Straws
• Chenille needle (these have a large eye and a blunt tip — perfect for threading paper)
Instructions
Step 1:
Cut Squares of paper for the flowers. The white one to be 4.25″x4.25″ (half the width of a letter size- You can make 4 flowers per sheet), and the yellow to be 2″x2″. I made 12 of each.
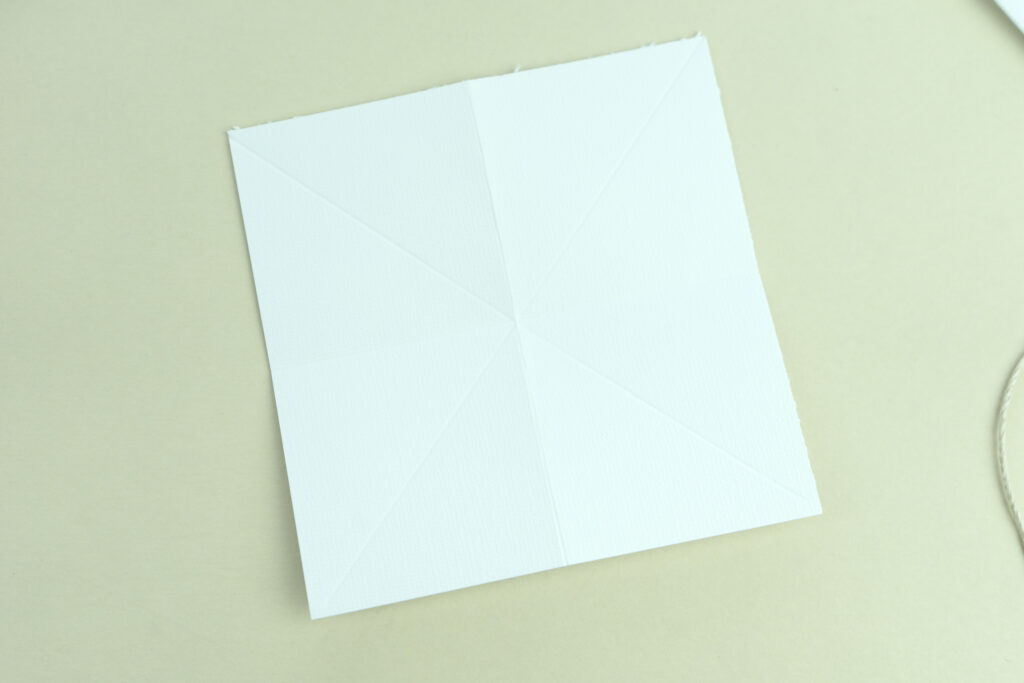
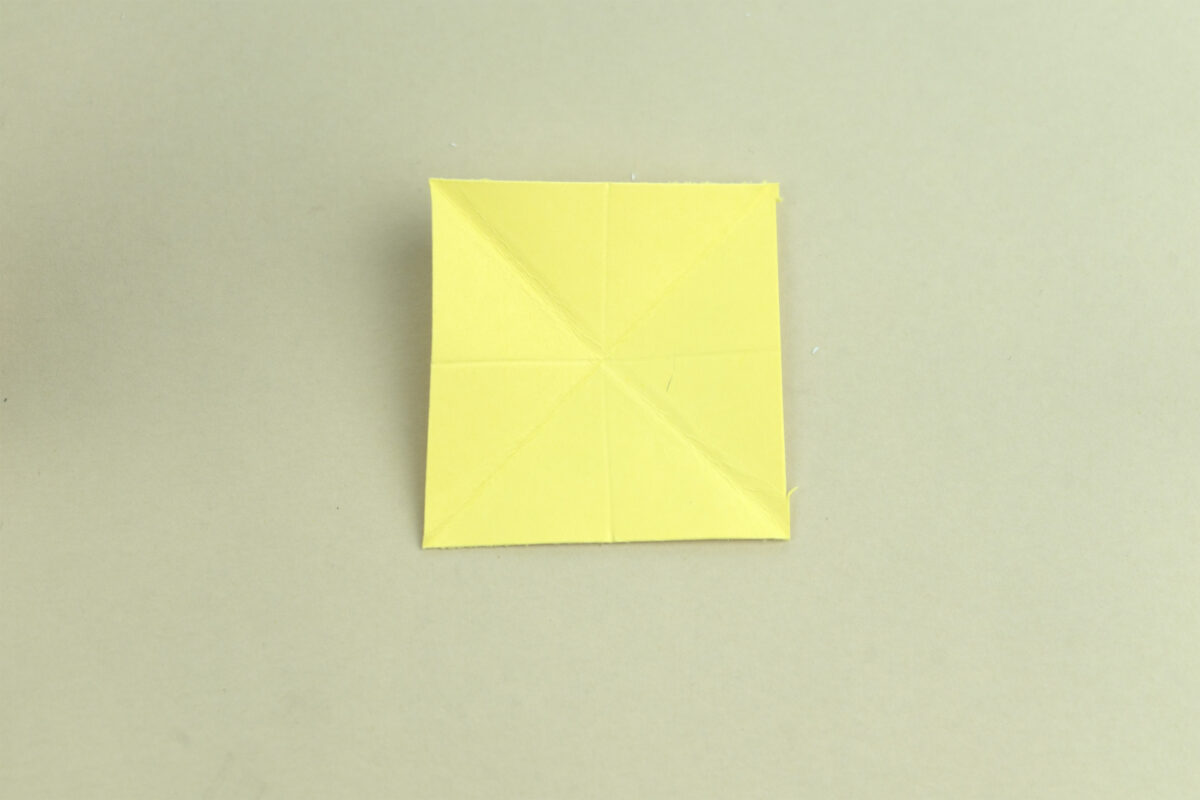
Fold your squares in half vertically, then horizontally — unfold. This gives you center guidelines.
Step 2:
Next, fold the square diagonally into a triangle, then fold that triangle in half again into a smaller triangle.
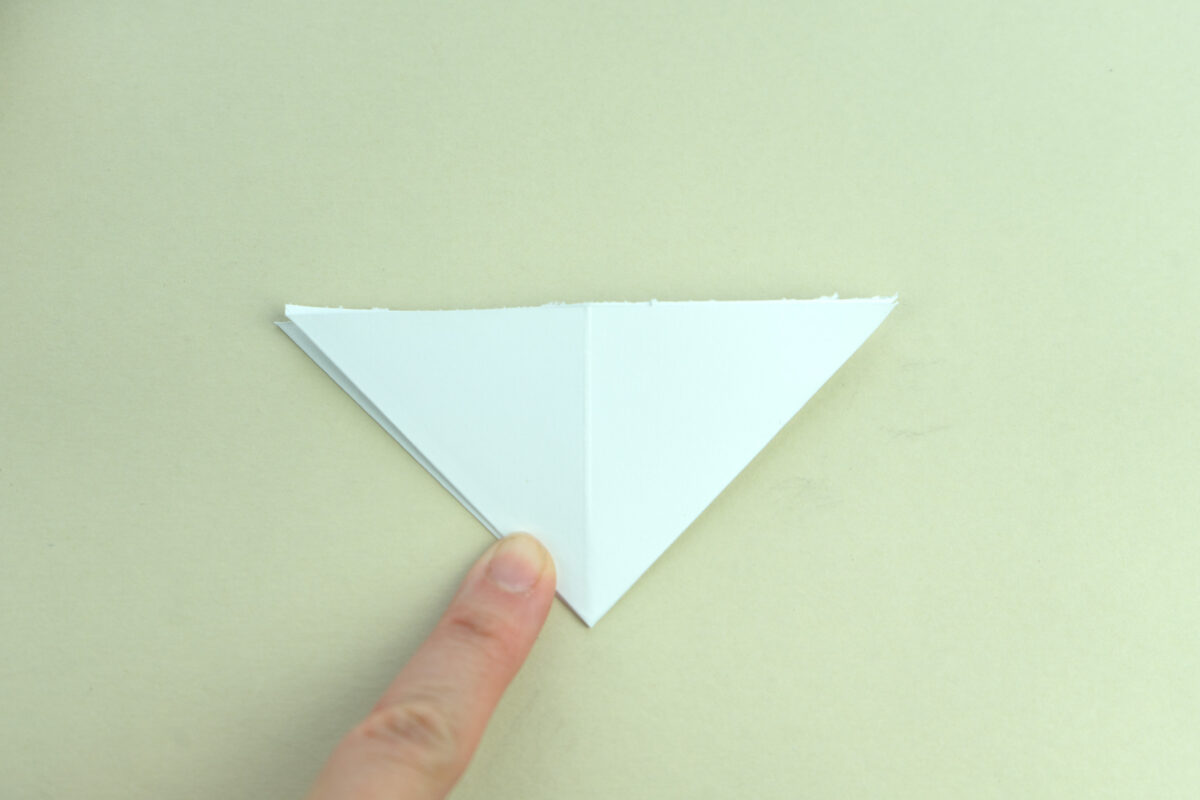

Do the same with the yellow squares.
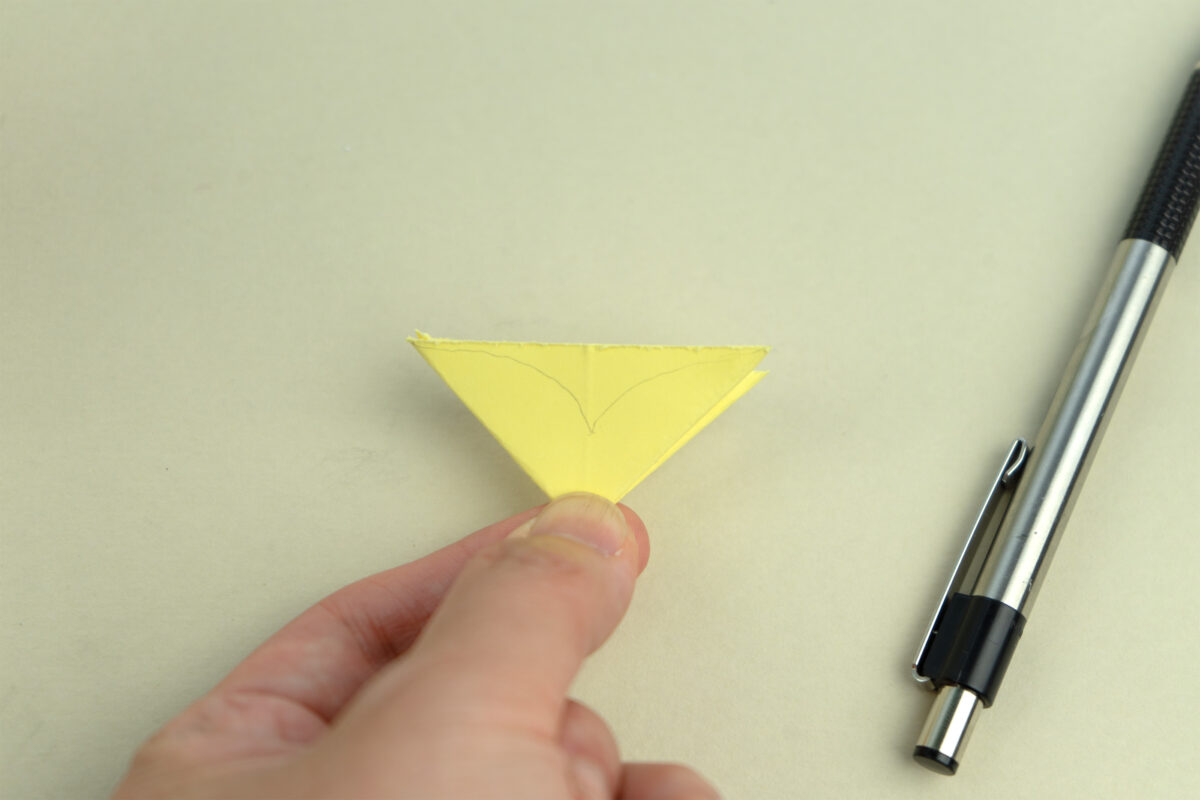

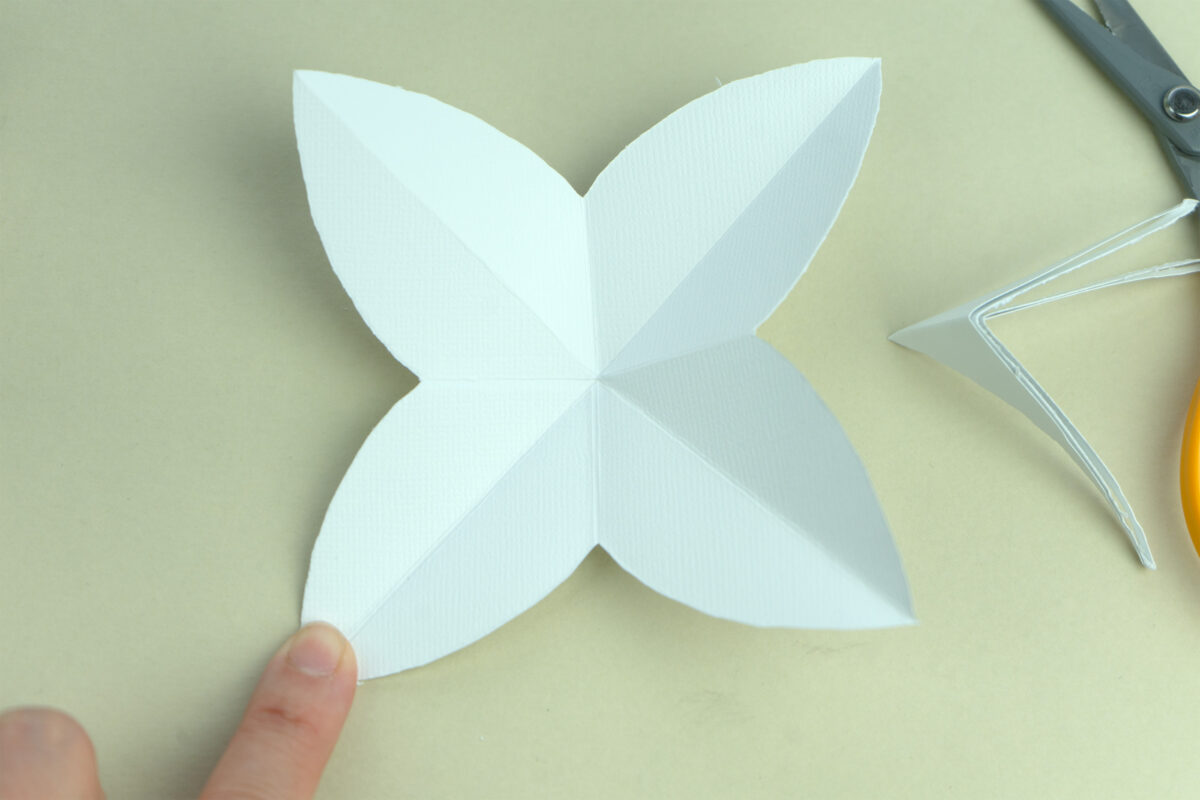
For both white and yellow, cut them along the line (shown in the photo) into a petal shape, so it looks like the photo below when you re-open them
Step 3: Form the white flower part
This is where it is a little different for the white and the yellow part.
For the white part, cut a slit off one of the sides, and glue one of the petals, and stack behind the adjacent petals to create a three petal flower.

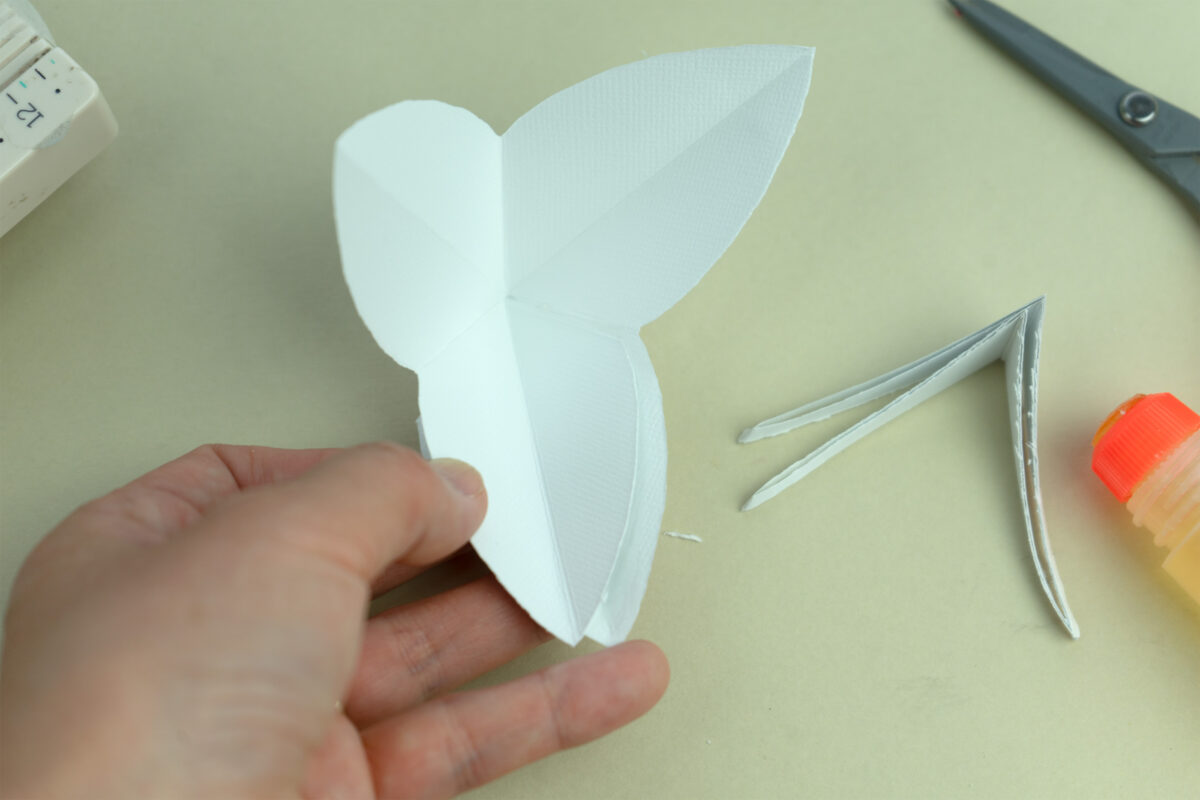
Once this part is done curl the petals out with something round like a pen.

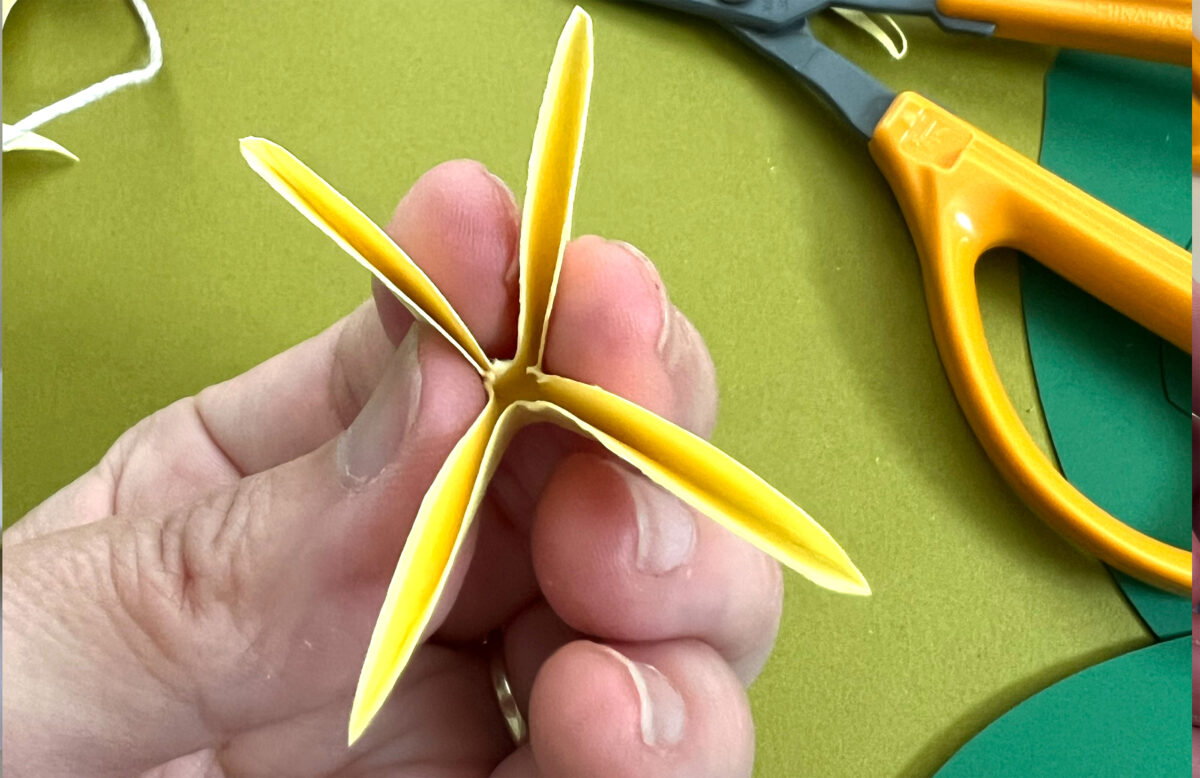
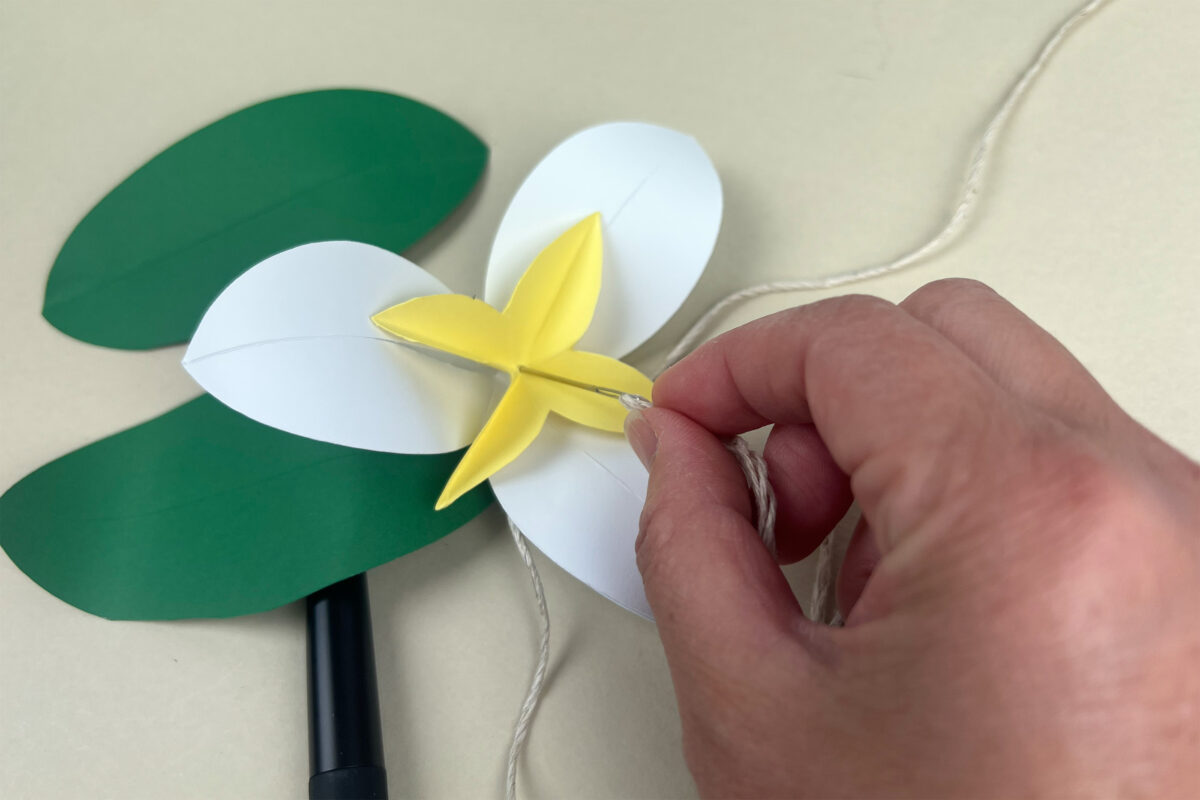
Step 4: Form the yellow flower part
For the yellow part, all you have to do is shape it to be like this.
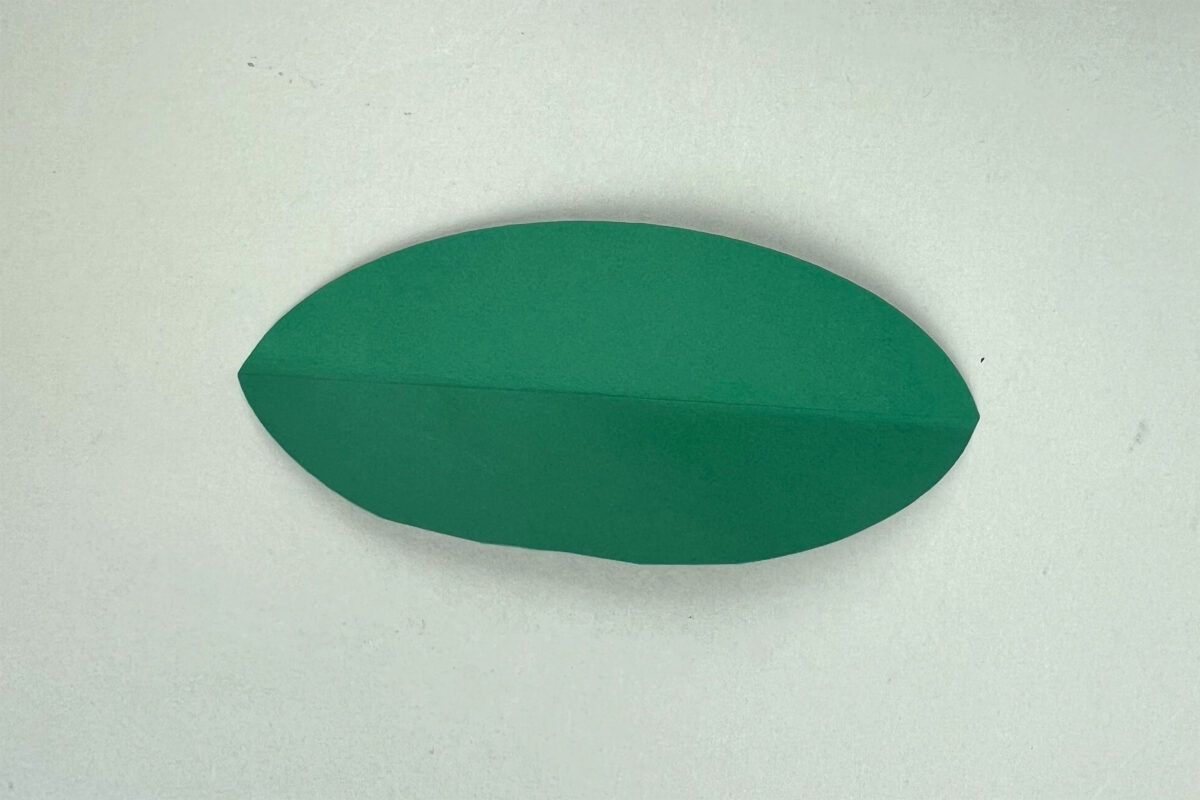
Cut the Leaves
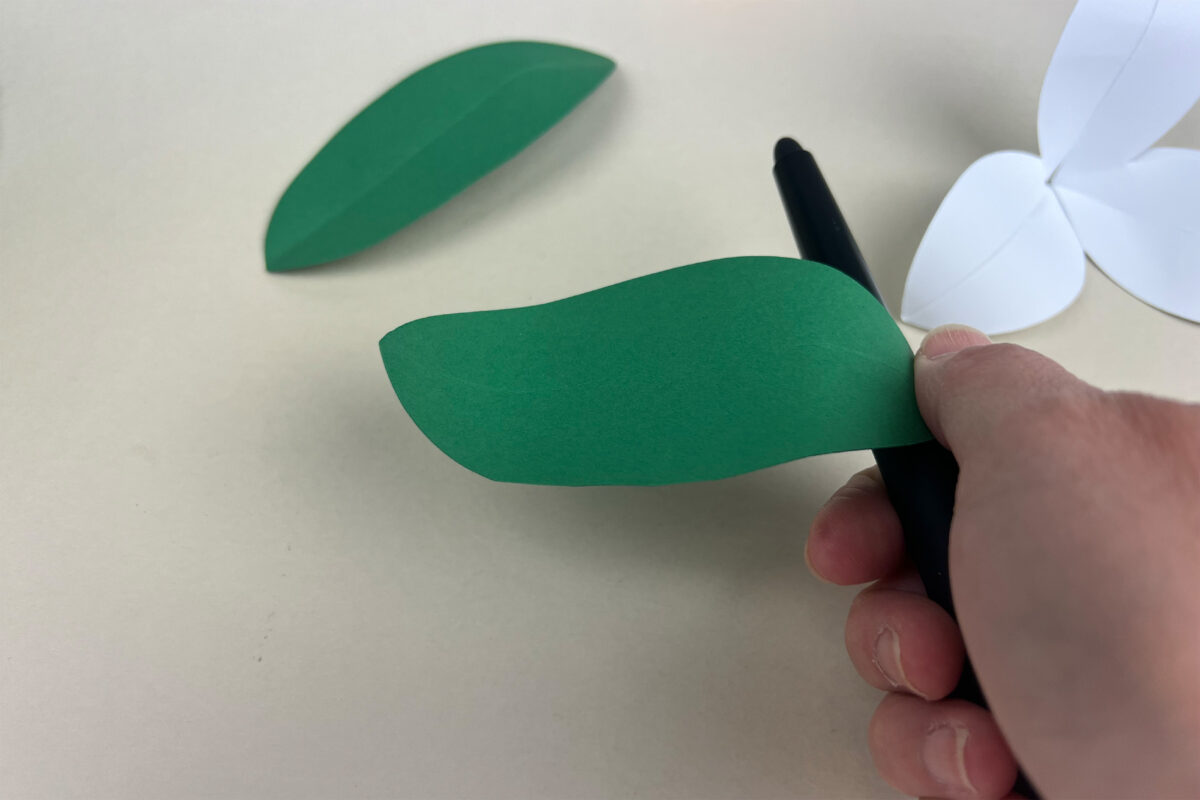
Cut some 4 green rectangles that is 4″x2″. Fold it in half long way, then cut out an arc to create a leaf shape.
Curl them with a pencil to create some movement.
Step 3: Thread the pieces through
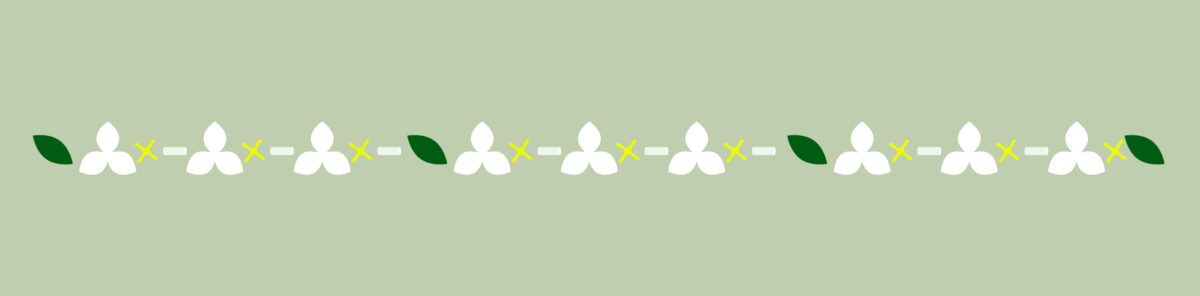
Cut a piece of twine about 2ft long, and thread it through a chenille needle. Tie the end, and start threading, first starting with a leaf, then alternating white flower, yellow flower, and straw pieces. I put in a leaf every 3-4 flower clusters.

You can adjust the balance and quantity as you go, and get a feel for how long you want them, or how dense you want them. if the straws are short or you don’t use the straws at all, you will get a really dense looking lei, which also looked pretty.
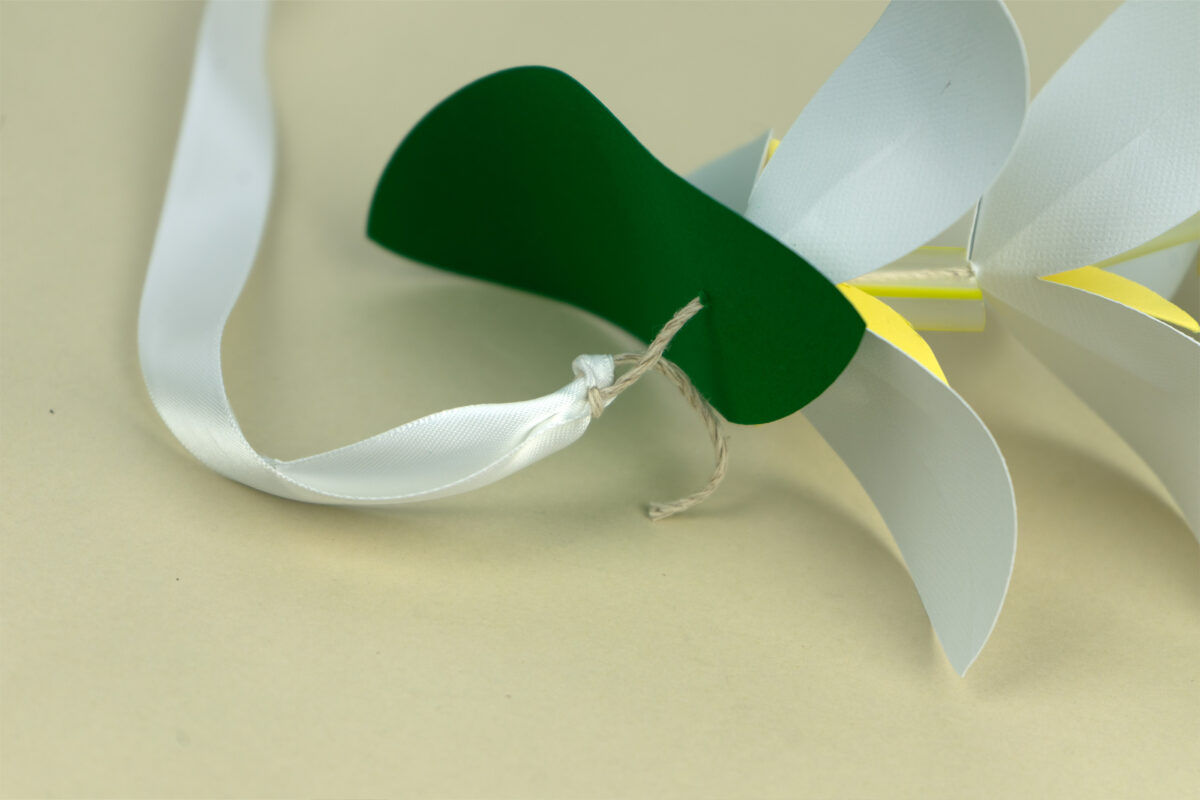
Step 4: Finishing touches
After threading 11–12 flowers, finish with a leaf and tie both ends of the twine to your ribbon. Adjust and tie a bow wherever you’d like it to sit.
That’s it — your handmade lei is ready to celebrate someone special!

I’d love to see if you make this — whether it’s for yourself or someone special! Feel free to tag me @bluefinworks, leave a comment below, or send a photo my way!